How to Install Drawer Slides: Side Mount, Bottom Mount and More
To install drawer slides, measure the drawer and cabinet, mount the cabinet members level and square, attach the drawer members to the drawer, then slide the drawer in and adjust it. Side mount slides need about 0.5 in of clearance on each side, while bottom (undermount) slides sit under the drawer and use rear brackets. The steps are the same for full extension, roller and epoxy-coated slides. Only the hardware and the way the drawer clips in change.
 HBL' DLSBest overall
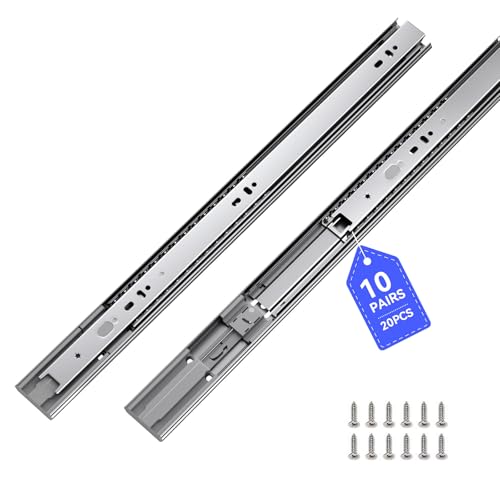 LONTAN SL4502S3-22-10PairsBig soft close pack
 VAGUDE 4512Short soft close pair
Before you start: measure and pick the right slide
Most installation trouble begins before any screw goes in. Measure the drawer depth and the cabinet depth first. The slide should match the drawer length or run a little shorter, and it cannot be longer than the cabinet. If you are still choosing hardware, our best drawer slides page lists lengths, load ratings and mount types side by side.
Next, check the clearance. Side mount slides need a gap between the drawer box and the cabinet wall. Several listings in our comparison, including the VAGUDE 12 in, Ourshom 16 in and REGUDA 12 in slides, call for 0.5 in on each side. That means the cabinet opening should be 1 in wider than the outside of the drawer box.
Also confirm the load rating. The slides in our lineup range from 50 lb to 200 lb, and the rating should sit above what the drawer will hold. Heavy items such as pots and tools belong on the higher ratings.
Tools and safety
You do not need a full workshop. A few basic tools cover almost every install.
Wear safety glasses when drilling pilot holes, because metal and wood chips fly. If you use a corded drill or saw, keep the cord clear of your work area and unplug tools when changing bits. Wear hearing protection if you cut anything to size.
- Tape measure and pencil
- Drill or screwdriver, plus a small bit for pilot holes
- Level and a combination square
- Two small spacer blocks or a scrap board cut to the mounting height
- Screws that came with the slides
- Clamps (helpful but optional)
How to install side mount slides, step by step
Side mount slides come in two parts per side: the cabinet member, which stays on the wall of the cabinet, and the drawer member, which attaches to the drawer box. Most are ball bearing slides with three sections. Separate the parts first. Many have a release lever or a small plastic buckle. For example, the VAGUDE and REGUDA listings describe a detachable inner track with a rear plastic buckle that you press to remove the drawer.
Work in this order for a clean result.
- Mark the height. Decide where the slide sits on the drawer side, usually centered or near the lower third. Mark the same height on both sides.
- Attach the drawer members first. Hold each one flush with the front of the drawer box, level with your mark, and drive screws through the round holes.
- Mount the cabinet members. Use a spacer block or a level line so both sides sit at the same height and run straight front to back.
- Start with one screw per slide. Use the center slotted holes first so you can adjust later.
- Fit the drawer. Pull the cabinet members out, line up the drawer members, and push the drawer in until the latch or detent engages.
- Test the motion, then add the remaining screws once the drawer runs smoothly.
How to install bottom mount (undermount) slides
Bottom mount slides attach under the drawer, so you see no hardware from the side. The Blum 21 in kit on our comparison page is an undermount set. Its listing shows locking devices (one left and one right) and rear mounting brackets in the box. Undermount slides usually need a drawer box built or cut to fit them, so check the maker's drawer dimensions before you start.
The process differs from side mount in a few ways.
- Mount the cabinet members on the inside of the cabinet, set back from the front by the amount the maker specifies.
- Attach the rear brackets to the back of the drawer box. These catch the slide when the drawer goes in.
- Fit the locking devices on the underside of the drawer front so the drawer clicks onto the slides.
- Set the drawer onto the slides and push it back until the locks engage on both sides.
- Use the adjustment screws or cams to fine-tune the height and tilt of the drawer front.
Full extension, roller and epoxy slides: what changes
The type of slide changes a few details, but not the basic layout. The table below shows what to watch for.
Full extension slides use three sections, so the drawer opens fully and you can reach the back. Roller slides use nylon wheels in a track instead of ball bearings and often have two sections, so they tend to be simpler but may not open the full drawer. Epoxy slides are roller or similar slides with a painted epoxy coating, which helps the finish hold up. The coating can scratch, so avoid dragging tools across it. If you want soft close, the damper is built into the slide, and you install it the same way.
One thing applies to every type: rated load depends on the slide length and on solid mounting. A slide screwed into thin or damaged wood will not carry its rating.
| Type | What to check | Install tip |
|---|---|---|
| Full extension (side mount) | Three sections, clearance on each side | Keep both sides the same height so the middle section does not bind |
| Roller | Wheel track must stay clean and straight | Align carefully, since wheels follow the track exactly |
| Epoxy coated | Coating can chip | Handle gently and drive screws straight to avoid scratches |
| Soft close | Damper sits in the slide | Fully seat the drawer so the damper engages |
| Undermount | Rear brackets and locking devices | Follow the maker's drawer size and back-set exactly |
Adjust, test and fix common problems
Open and close the drawer several times. It should glide without rubbing and stop cleanly. If it does not, find the cause before adding more screws.
If the drawer sticks, the slides are probably not parallel, or the gap is too tight. Loosen the screws, check the spacing against the clearance, and retighten. If the drawer front is crooked, shift one cabinet member up or down using the slotted holes. If the drawer rolls open by itself, the cabinet may be out of level, so check it before you blame the slide.
For heavy drawers, use the full set of screw holes. If you pick slides for a heavy load, look at the steel thickness and finish too, since our best drawer slides guide notes that thicker steel flexes less and coated finishes resist rust in damp rooms.
Frequently asked questions
Do both slides have to be at exactly the same height?
Yes, as close as you can get. A small difference makes the drawer bind or rack. Use a spacer block or a level line for both sides.
Can I install slides on an old drawer?
Often yes, if the drawer box is square and the wood is solid. Check that the sides are thick enough to hold screws and that the box leaves the needed side clearance.
What if my slides came without a drawer release?
Some slides are not detachable. In that case, line up the drawer members with the cabinet members and push the drawer in at the same time. A helper makes this easier.
How many screws should I use?
Use every hole the maker provides on heavy-duty drawers. For light drawers, the slotted holes plus a few round holes are often enough, but follow the instructions in the box.