How to Install a Smart Light Switch Step by Step
To install a smart light switch, turn off the circuit breaker, confirm the power is off with a voltage tester, label and disconnect the old switch, then connect the line, load, neutral and ground wires to the new one. Mount it, restore power, and pair it with the maker's app over 2.4 GHz Wi-Fi. Before you start, make sure your switch box has a neutral wire, because every switch on our comparison page needs one.
 Kasa Smart KS230 KITBest overall
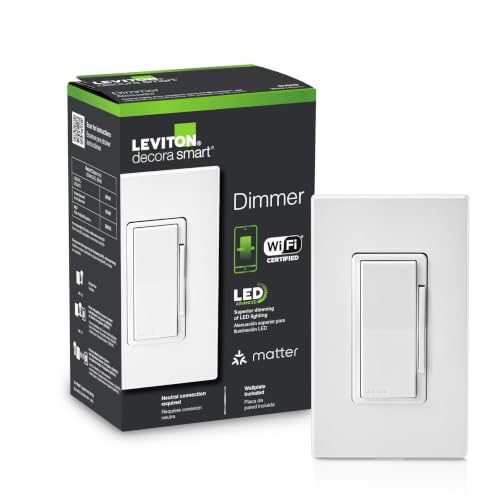 Leviton R02-D36HD-1RWBest for mixed ecosystems
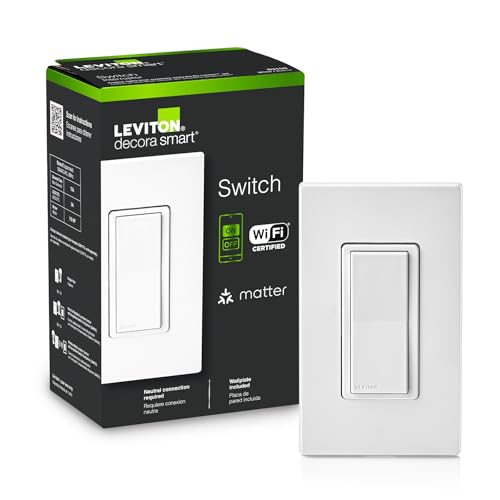 Leviton R02-D315S-1RWMatter on/off with three-way
Before you start: three quick checks
Most installs go wrong before any wire is touched. Spend ten minutes on these checks and the rest is routine.
First, look for a neutral wire. Smart switches need a constant trickle of power to keep their Wi-Fi radio running, and that power comes through the neutral. Some homes built before the mid-1980s may not have one in the switch box. If you cannot find one, ask an electrician. Our best smart light switch page covers this check in more detail.
Second, find out whether your circuit is single-pole or three-way. A single-pole circuit has one switch controlling the light. A three-way circuit has two switches controlling the same light, such as at the top and bottom of stairs. Only some models support three-way wiring, and some single-pole dimmers state plainly that they are not wired three-way dimmers.
Third, confirm your Wi-Fi. Several listings in our data call for a 2.4 GHz connection, so if your router combines 2.4 and 5 GHz under one name, you may need to set your phone to 2.4 GHz during pairing.
Tools and materials
You do not need a large toolkit. Gather these before you turn off the power so you are not walking back and forth in the dark.
- Non-contact voltage tester (and a multimeter if you want to confirm wire roles)
- Flathead and Phillips screwdrivers
- Wire stripper
- Masking tape and a marker for labeling wires
- Wire connectors, usually supplied with the switch
- A flashlight or headlamp
- Your phone, with the switch's app already downloaded
Step by step: wiring a single-pole switch
These steps cover the common single-pole case. Always follow the diagram that comes with your specific switch, since terminal names and wire colors differ between brands.
- Turn off the breaker. Switch off the breaker that feeds the light, then flip the wall switch to confirm the light goes dark.
- Test for power. Remove the wall plate and the screws holding the old switch. Pull the switch out gently and hold the voltage tester near each wire and terminal. Do not go further until the tester shows no power. If it beeps, you have the wrong breaker.
- Photograph the wiring. Take a clear photo of how the old switch is connected before you disconnect anything.
- Identify the wires. In a single-pole box you will usually find a line wire (power coming in), a load wire (power going to the light), a neutral wire (often white, usually bundled with other whites at the back of the box) and a ground wire (bare copper or green). Wire colors can vary in older or modified wiring, so label each one with tape.
- Disconnect the old switch. Loosen the terminals and remove the old switch. Straighten and, if needed, trim and re-strip wire ends so the copper is clean.
- Connect the new switch. Match each wire to the labeled terminal or lead on the new switch: line to line, load to load, neutral to neutral, ground to ground. If the switch uses pigtail leads, twist the connection and cap it firmly with a wire connector. Tug each wire gently to confirm it is secure.
- Fold and mount. Fold the wires neatly into the box, keeping the neutral and ground leads from pressing against the line terminals. Screw the switch into the box. One listing in our data notes that a wall box at least 2 inches deep is required, so a shallow box can make this step tight.
- Restore power. Attach the wall plate or leave it off for testing, turn the breaker back on, and look for the switch's indicator light.
Three-way circuits are different
With two switches controlling one light, the wiring includes traveler wires that run between the switches, plus a common terminal. Mixing these up is the most common three-way mistake.
Label the common wire before you disconnect it. The common wire is usually attached to a differently colored terminal screw on the old switch, and the traveler wires go to the other two terminals. Check your product's instructions to learn whether the smart switch goes on the line side or load side, and whether the second location needs a companion or accessory switch.
Support matters here. On our comparison page, only the Kasa KS230 and the two Leviton models list three-way support, while the Tapo S500D listing says it is not a wired three-way dimmer. If your wiring is confusing, hiring an electrician for this one switch is a reasonable choice.
Connect the switch to your app and voice assistant
Once the switch has power, put it in pairing mode as the instructions describe. This is often shown by a blinking light. Open the maker's app, create an account if asked, and follow the guided setup. Several listings in our data describe app-guided installation, so the app will usually walk you through naming the switch and joining your Wi-Fi.
If pairing fails, the usual causes are a phone connected to 5 GHz Wi-Fi, a router too far from the switch, or a switch that was not reset before setup. Move closer, switch your phone to 2.4 GHz and try again.
After the switch appears in the app, link it to Alexa, Google Home or Apple Home as supported. Platform support differs by model. Matter is listed on the two Leviton models, which helps if your household uses more than one platform.
Finally, test everything. Turn the light on and off at the switch, in the app and by voice. If it is a dimmer, check that your bulbs are dimmable and that the total wattage on the circuit stays within the switch's load limit.
Common problems and quick fixes
Most trouble shows up in the first day. This table covers the usual suspects.
| Symptom | Likely cause | What to check |
|---|---|---|
| Switch has no light | Loose or missed connection | Turn off the breaker and recheck line and neutral |
| Cannot pair in app | Wrong Wi-Fi band | Use 2.4 GHz and move closer to the router |
| Bulbs flicker or buzz when dimmed | Bulb not dimmable or load too low | Use dimmable bulbs and check the load rating |
| Light stays on or off | Line and load swapped | Compare to the wiring diagram |
| Three-way misbehaves | Common and traveler mixed | Recheck your labeled wires |
Safety notes
Work only with the breaker off, and verify with a tester every time. A wall switch being off does not mean the wires are dead. If you see aluminum wiring, scorched insulation, cloth-covered wires or a box that is crowded, stop and call a licensed electrician. Rules about permits and who may do electrical work vary by location, so check your local requirements. If you use a ladder to reach a high box, set it on level ground and keep your hands free.
Frequently asked questions
Can I install a smart switch without a neutral wire?
Not with the products on our comparison page, since each one needs a neutral. If your box lacks one, ask an electrician about options before buying.
Do I need to replace my bulbs?
For on/off switches, usually not. For dimmers, you need dimmable bulbs, and you should compare the circuit's total wattage with the switch's load limit.
How long does an install take?
Plan on a short job for a single switch if the wiring is straightforward. Allow more time for three-way circuits or if you need to trace wires.
What if the switch will not connect to Wi-Fi?
Check that your phone and the switch are on a 2.4 GHz network, move the router or a range extender closer, then reset the switch and retry the pairing steps.