How to Hammer in Finishing Nails and Brad Nails
Yes, you can hammer both finishing nails and brad nails by hand. Start each nail with light taps, drive it with controlled swings until the head is almost flush, then sink it just below the surface with a nail set. A lighter hammer with a smooth face gives you more control on trim and leaves fewer marks.
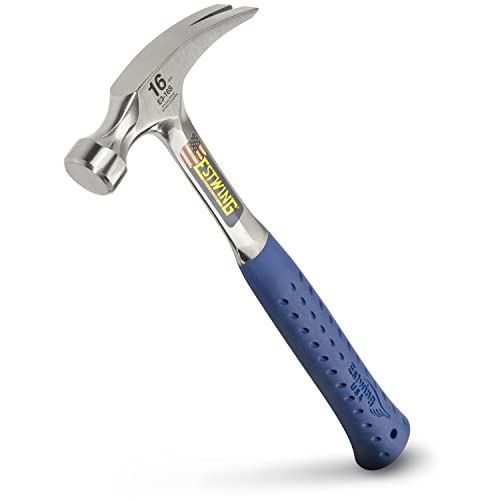 Estwing E3-16SBest overall
 Jorgensen 60102Magnetic starter, 20 oz head
 Estwing E3-16CCurved claw for prying
Finishing nails vs. brad nails
Both nails are made for trim, molding and small woodworking jobs where you want a small, neat hole. The difference is mostly thickness and holding power.
Finishing nails are thicker, usually around 15 or 16 gauge, and hold heavier trim such as baseboards and door casing. Brad nails are thinner, usually 18 gauge, and suit light molding, small frames and craft work. A lower gauge number means a thicker nail.
Brads are easy to bend because they are so thin. That is why technique matters more than strength when you drive them by hand.
| Feature | Finishing nail | Brad nail |
|---|---|---|
| Typical gauge | 15 or 16 | 18 |
| Holding power | Stronger | Lighter |
| Bends easily | Less likely | More likely |
| Best for | Baseboards, casing, trim | Thin molding, small frames, crafts |
| Hole size | Small | Very small |
Choose the right hammer
A lighter hammer is easier to control for trim work. Our best hammer page notes that a 16 oz head suits general repairs, while heads of 20 oz and up add driving power for framing but take more effort over a long day. For small nails, you rarely need that extra weight.
Face type also matters. A milled face grips the nail head, which helps on bigger nails but can leave a waffle pattern on wood if you miss. A smooth face leaves fewer marks. Among the hammers on our page, the Estwing E3-16S has a 16 oz head and a smooth face, so it is a reasonable fit for trim work on paper.
A magnetic nail starter, which some hammers on our page list, lets you set a nail one-handed. That is handy for brads, because it keeps your fingers out of the strike zone.
What you need before you start
A few simple items make the job cleaner and safer.
- A hammer with a head weight you can swing accurately
- A nail set, which is a small steel punch for sinking nail heads below the surface
- Safety glasses
- Needle-nose pliers or a stiff piece of cardboard to hold small nails
- A pencil and a stud finder or tape measure to mark nail spots
- Wood filler and a putty knife to cover the holes afterward
How to hammer in a finishing nail
Take your time on the first few taps. Most bent nails come from rushing the start.
- Mark where the nail should go, and aim to hit solid framing or a stud behind drywall when you are attaching trim.
- Hold the nail near the top with your fingertips, with the point against the wood.
- Tap the head lightly two or three times until the nail stands up on its own, then move your fingers away.
- Grip the hammer near the end of the handle for better leverage and a smoother swing.
- Swing from your elbow and wrist, and keep your eyes on the nail head, not the hammer.
- Drive the nail until the head is about 1/8 inch above the surface. Stop there so the hammer face does not dent the wood.
- Place the nail set on the head and tap it until the head sits slightly below the surface.
- Fill the small hole with wood filler, let it dry, and sand it smooth.
How to hammer in brad nails by hand
Brad nails follow the same steps, but they need a lighter touch. The thin shaft bends easily, so use short, controlled taps instead of big swings.
To save your fingers, push the brad through a small piece of cardboard and hold the cardboard instead of the nail. Once the brad stands on its own, tear the cardboard away. You can also grip the brad with needle-nose pliers for the first few taps.
Brad heads are tiny, so a nail set is often the safer way to finish. A hammer face can slip off a small head and mark the trim. If you work with hardwood, drill a pilot hole slightly thinner than the nail. This keeps the brad straight and helps prevent splitting.
Fixing common problems
Even careful work goes wrong sometimes. Here is how to handle the usual trouble spots.
If a nail bends, do not keep hammering it. Pull it out with the claw, protect the trim with a thin scrap of wood under the hammer head, and start a new nail a little to the side.
If the wood splits, stop and move the nail farther from the end of the board. Pilot holes help here. You can also blunt the nail tip with a light tap, which makes it crush the wood fibers instead of wedging them apart.
If you leave hammer marks, switch to a smooth-faced hammer or stop earlier and let the nail set finish the job. A hammer with a removable rubber mallet cap, such as the Spec Ops model on our best hammer comparison, is another option for non-marring work, though it is meant for tapping rather than driving nails.
Safety notes
Wear safety glasses every time. Small nails can bend, snap or fly off when struck, and wood chips can fly too.
Check what is behind the surface before you drive nails into a wall. Electrical wires and pipes can sit inside walls, and a nail through a wire is a shock and fire risk. If you are unsure, use a stud finder that detects live wires, or switch off power to the circuit at the panel before you work.
If you work on a ladder, keep both feet on the steps and keep your body centered. Do not reach too far to hit a nail. Keep small nails out of reach of children and pets.
Frequently asked questions
Can you hammer brad nails by hand?
Yes. Brads are made for pneumatic nailers, but they go in fine with a hammer if you use light taps, hold the nail with pliers or cardboard, and finish with a nail set.
Do I need a nail set?
It is strongly recommended. A nail set lets you sink the head below the surface without hitting the trim, so the filled hole is neat and the wood is not dented.
Should I drill pilot holes for trim nails?
Drill them in hardwood, near board ends, or when the wood tends to split. Use a bit slightly thinner than the nail so it still grips.
What size nail should I use for baseboards?
Pick a finishing nail long enough to pass through the trim and reach solid framing behind it. Thicker trim needs a longer nail than thin molding.