How to Get Good Lighting in Your Room for Pictures
Start with a window. Soft daylight from the side gives the most flattering, natural-looking pictures. Then fill in shadows with one or two lamps set to a matching color temperature, and turn off any mismatched lights. If you need artificial light, a dimmable fixture with a wide color range and a high CRI gives you the most control.
 LUTEC XDD-7Best overall
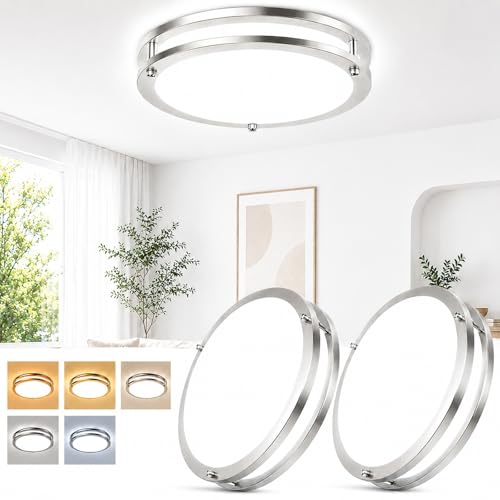 weddeg 63633008-03CRI 90 two-pack
 Brightever XD300-09Most efficient on the page
Start with the window
Natural light is the easiest way to improve a photo taken at home. A window acts like a large, soft light source, which smooths skin, softens shadows and keeps colors looking natural.
Place your subject near the window and turn so the light hits them from the side or at a slight angle. Side light shows shape and texture. Light straight from behind the subject, with the window in the background, tends to turn them into a dark silhouette unless you add fill light on the front.
Direct sun streaming through glass creates hard, sharp shadows. If you see a harsh patch of sunlight, hang a sheer white curtain over the window or move your setup to a spot the sun does not hit directly. Bright overcast days often give the most even light of all.
Soften and shape the light
Soft light comes from a large source that is close to your subject. Hard light comes from a small or distant source. In a room, you can make light softer in a few simple ways.
Bounce light off a white wall, a white poster board or a light-colored sheet. This fills in dark sides of the face or product without adding another lamp. Diffusing also helps, such as a thin white curtain over a window or a lampshade over a bare bulb.
- Move your subject closer to the window to make the light larger and softer.
- Face a white wall or board toward the shadow side to bounce light back.
- Hang a sheer curtain over the glass to calm harsh midday sun.
- Close blinds partway if one side of the room is far brighter than the other.
Keep one color of light
Mixed light is a common reason room photos look off. Daylight is cool and bluish, while many bulbs are warm and orange. When both hit the same scene, your camera cannot balance them, and skin or walls can look patchy.
Color temperature is measured in kelvin (K). Around 2700K and 3000K looks warm and cozy. Around 5000K to 6500K looks cool and close to daylight. For pictures, pick one family and stick with it. If you shoot by a window in the daytime, switch off warm lamps and use cooler bulbs only if you need extra light.
If you shoot at night with no window light, choose one color temperature for every lamp in the frame. Then set your phone or camera white balance to match, or tap on a gray or white object to lock it.
Use ceiling and room lights as support
A single ceiling light can work for pictures, but it lights from directly above. That can create shadows under the eyes, nose and chin, and darken the lower part of a scene. Treat it as general room light, then add side or front light from lamps or a window to balance it.
If you are choosing a fixture, a few specs matter for photos. Brightness in lumens tells you how much light you get, and the maker's coverage area helps you match it to the room. A wide color temperature range lets you match the light to daylight or a warm evening mood. Dimming lets you lower brightness for a softer look without changing the color. CRI, or color rendering index, shows how true colors appear, and a higher number is better for fabrics, skin and artwork.
On our best lighting for living room page, we compare fixtures on these exact specs. For example, the weddeg 2-pack lists 3600 lumens per fixture, a 2700K to 6500K range, dimming from 10% to 100%, and a CRI of 90. The LUTEC lists 4200 lumens, five color presets from 3000K to 6500K, and a coverage area of 250 sq ft. Note that on both, color temperature is chosen with a switch on the fixture, so set it before you mount it. The listing for the weddeg also names a 3-year warranty.
A simple room setup, step by step
Here is a straightforward routine you can repeat any time you want better pictures at home.
- Pick the spot nearest a window and clear clutter from the background.
- Turn off lights that clash with the window color, or switch them to a similar color temperature.
- Place your subject at a slight angle to the window so light falls on one side.
- Add a white sheet or board on the opposite side to bounce light back into the shadows.
- If it is dark, dim the ceiling light and add a lamp near your subject, slightly above eye level.
- Take a test shot, check the colors and shadows, and adjust the distance or brightness.
Which light source for which job
Different sources suit different situations. This table sums up how each one behaves for pictures.
Use it as a quick guide when you decide where to set up.
| Light source | Best for | Watch out for |
|---|---|---|
| Window light | Portraits, products, everyday room shots | Harsh direct sun and changing light through the day |
| Ceiling light (dimmable) | General fill and evening light | Top-down shadows and flat looking scenes |
| Table or floor lamp | Side or fill light near your subject | Color that does not match other lights |
| White bounce board | Softening shadows without extra power | Needs a spot close to the subject |
| Dimmer or color-selectable fixture | Matching mood and color across a room | Settings you must choose before mounting on some models |
Safety notes
Lighting upgrades are simple, but a few precautions matter. If you change a ceiling fixture, turn off the power at the breaker, not just the wall switch, and confirm it is off before touching any wiring. Follow the maker's instructions, and hire a licensed electrician if you are unsure or if the wiring looks old or damaged.
Use a stable ladder on a level floor and have someone steady it. Do not stretch to reach the ceiling. For lamps and stand lights, keep cords out of walkways, avoid running them under rugs and keep hot bulbs away from curtains, paper and fabric. Do not stare into very bright lights, and take breaks if you work under bright light for a long time.
Frequently asked questions
Can I use my phone's flash for room pictures?
It is better to avoid it. A built-in flash is a small, hard light that flattens faces and creates harsh shadows. Window light or a lamp with a shade gives a softer result.
What time of day is best for window light?
Soft light is easiest when the sun is not shining straight through the glass. A window that faces away from direct sun, or a bright overcast day, gives even light for much of the day.
Should I use warm or cool bulbs for pictures?
Either works, as long as the lights in the frame match each other and match your white balance. Warm light looks cozy, and cooler light looks cleaner and more like daylight.
Why do my room photos look yellow or blue?
Usually the light sources are different colors, or the camera white balance is set for a different light. Switch off the odd light out and set white balance manually or by tapping a neutral object.