How to Clean and Disassemble a Kitchen Faucet Head
For most clogged or weak faucet heads, soak the head in white vinegar for 30 to 60 minutes, then scrub the aerator screen and rinse. If that does not work, unscrew the aerator or spray face, clean each part, and reassemble in the same order. A wobbly faucet is usually fixed by tightening the mounting nut under the sink.
 Moen 7594SRSBest overall
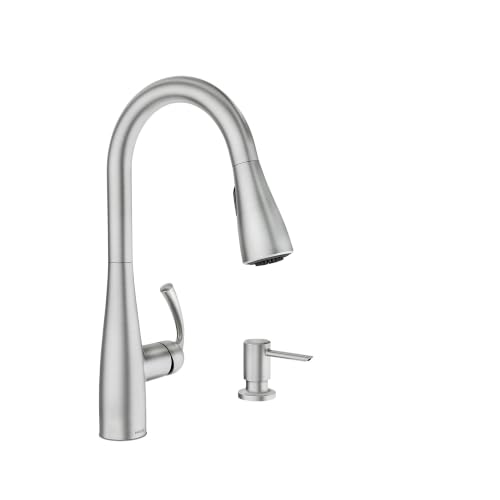 Moen 87014SRSBest for big sinks
 GIMILI GM1019NBest for RVs and small sinks
What you need before you start
Most faucet head jobs take basic items you already own. Gather everything first so you are not hunting for a tool with a wet sink and half a faucet in your hands.
Hard water leaves mineral scale, which is why spray patterns get uneven and the stream sputters. Vinegar dissolves that scale well. Harsh abrasives and strong chemical cleaners can strip a finish, so stay gentle.
- White vinegar and a small plastic bag or a bowl
- A rubber band, twist tie or string
- An old toothbrush and a straight pin or toothpick
- A soft cloth for drying and buffing
- Adjustable pliers wrapped in tape or a cloth, to protect the finish
- A small flat screwdriver or a hex key, since some heads use a set screw
- A flashlight and a basin wrench for work under the sink
- Safety glasses, because vinegar and mineral flakes can splash into your eyes
Clean the head without taking it apart
Start here, because it solves most spray problems and carries the least risk. You are only soaking the end of the faucet, so there is nothing to lose or reassemble.
Do not use vinegar on natural stone counters near the faucet, since the acid can etch them. Wipe up any drips right away. Never mix vinegar with bleach or other cleaners, because the combination can release harmful fumes.
- Fill a plastic bag about halfway with white vinegar.
- Lift the bag so the whole faucet head sits in the vinegar, then fasten it around the neck with a rubber band or twist tie.
- Wait 30 to 60 minutes. Check sooner on brushed or coated finishes and remove the bag if you see any dulling.
- Take the bag off and run the water for a minute to flush out loosened deposits.
- Rub the spray face with an old toothbrush and poke each clogged hole gently with a pin.
- Dry and buff with a soft cloth.
How to disassemble a kitchen faucet head
If the flow is still weak after a soak, the trouble is probably inside. Most pull-down and pull-out heads come apart in a few simple steps, though designs vary, so look closely at yours before you twist anything.
Work over a towel in the sink, and close the drain or place a cloth over it so small parts cannot fall in. Turn the water off at the handle before you begin. If the head is still attached to the hose, let the hose retract or hold it firmly so it does not whip back.
- Pull the head out and look for a screw, a hex set screw or a plain threaded collar.
- Unscrew the spray face or aerator by turning it counterclockwise. Use taped pliers only if it is too tight to turn by hand.
- Lay out each part in the order it came off, or snap a photo. Expect a screen, a rubber washer and a flow insert or small plastic disc.
- If your head has a separate button for switching spray modes, do not pry it. Switches are often glued or press-fit and break easily.
- Unthread the head from the hose only if you need to clear debris from the hose end. Many hoses connect with a quick-connect fitting or a threaded collar, and the owner's manual shows which.
Clean the parts and put everything back
Soak the small parts in a bowl of vinegar for 30 minutes. Scrub the screen with a toothbrush until you can see light through all of it. Rinse every piece in clean water.
Reassemble in the reverse order, with the washer seated flat and the screen facing the right way. Hand-tighten only. Overtightening can crack plastic parts or crush a washer, which causes leaks.
Turn the water back on slowly and check for drips around the head. Run each spray mode, since a head with several modes has more internal channels that can clog. For example, our spec comparison lists 4 modes for the Moen Arbor, and each one should flow evenly after cleaning.
How to tighten a loose faucet base
A faucet that rocks or swivels at the base needs its mounting hardware snugged up. This is separate from the head, but it often shows up at the same time, especially after you have been pulling the hose a lot.
Look under the sink with a flashlight. You should see either a large mounting nut or a bracket with screws holding the faucet shank to the sink. Turn the water off at the shutoff valves first, and clear the cabinet so you have room to work. Wear safety glasses, since debris and drips fall toward your face when you look up.
Tighten the mounting nut clockwise with a basin wrench, which reaches into the tight space behind the sink. If your faucet uses a bracket, tighten the screws a little at a time, alternating sides. Stop when the faucet feels firm. Too much force can crack a porcelain sink or warp a deck plate.
If the faucet sits on a deck plate, check that it is flat and not shifted. Some faucets fit single-hole or three-hole sinks, so see whether the plate is covering unused holes cleanly. If the base still moves, the rubber gasket under the faucet may be worn, and replacing it is a better fix than cranking the nut.
Troubleshooting at a glance
Use this table to match a symptom to the most likely cause and the first thing to try.
| Symptom | Likely cause | First fix |
|---|---|---|
| Weak or uneven spray | Mineral scale in the aerator or spray face | Vinegar soak, then scrub the screen |
| Spray goes sideways | A clogged hole in the spray face | Clear each hole with a pin |
| Head droops or will not dock | Debris or a worn part in the docking area | Clean the neck and check the hose weight or counterweight |
| Drip around the head | Worn or misplaced washer | Reseat or replace the washer |
| Faucet rocks at the base | Loose mounting nut or bracket | Tighten from below with a basin wrench |
| Water at the base of the handle | Worn cartridge or o-ring | Check the manual and replace the cartridge |
When cleaning is not enough
Regular upkeep keeps a faucet working for years, but parts do wear out. If you have cleaned the head, replaced washers and tightened the base, and the faucet still drips or the head will not dock, it may be time to replace the faucet.
When you shop, look at how smoothly the head docks, the hose length and the spray modes. Our best kitchen faucets page puts these specs side by side. For example, the Moen Arbor lists a 68 in hose and the Moen Essie a 67 in hose, and both have the Reflex docking system for secure docking of the spray head.
Cartridge durability is another thing worth comparing. The OWOFAN pull-down faucet lists a cartridge tested to 500,000 cycles, so you can see how that compares in the kitchen faucet comparison. A finish that resists fingerprints and water spots also cuts down on how often you need to clean the faucet body.
Frequently asked questions
How often should I clean my faucet head?
Every few months is a good habit in hard water areas. Clean it sooner if the spray looks uneven or the flow weakens.
Can I use lemon juice instead of vinegar?
Yes, lemon juice is also acidic and can loosen scale, but it works more slowly and leaves a residue. Rinse well afterward.
Will vinegar damage my faucet finish?
Long soaks can dull some coated or brushed finishes. Keep the soak short, check it often and rinse and dry the faucet afterward. If your manual warns against acids, use mild dish soap instead.
Do I need a plumber to take the head apart?
No. Cleaning and reassembling the spray head needs basic hand tools. Call a plumber if you find a leak at the hose connection or under the sink that tightening does not stop.
Why is my faucet still weak after cleaning the head?
Check the shutoff valves under the sink, which may be partly closed. Also check the hose for kinks and inspect the cartridge for wear.