How to Clean a Detail Sander and Its Sanding Pad
Unplug the sander, peel off the old sheet, then brush and vacuum the dust from the pad, vents and dust port. Clean a dirty hook-and-loop face with a stiff brush, and replace the pad when the hooks are flattened or the edges are torn. A few minutes of cleaning after each project keeps the sander gripping and sanding evenly.
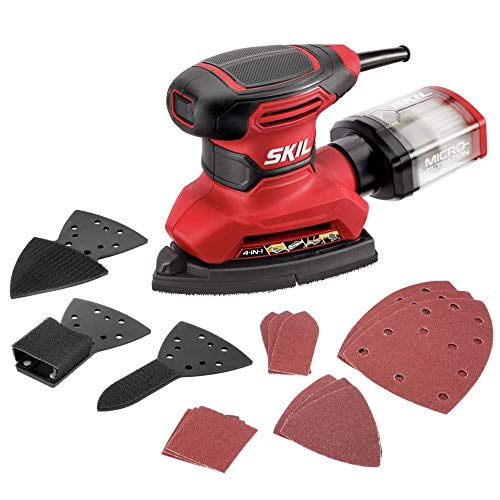 Skil SR232301Best overall
 HYCHIKA BETTER TOOLS FOR BETTER LIFE MS200WCompact with dust bag
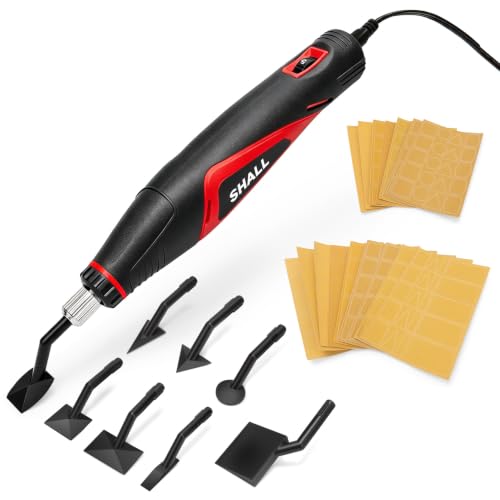 SHALL SH111052Lightest in the lineup
Before you start: safety first
Always disconnect the sander from power before cleaning. For a corded model, pull the plug from the outlet. For a battery model, remove the battery. A sander that starts by accident while your fingers are near the pad can cause a real injury.
Wear safety glasses and a dust mask while you clean. Fine sanding dust, especially from old paint, treated wood or drywall compound, should not be breathed in. If you suspect old paint on the surface you were sanding, use a respirator rated for fine dust and do not blow the dust around with compressed air indoors.
What you need
You do not need special products. Most of the supplies are probably in your shop already.
- A stiff nylon bristle brush (an old toothbrush works for tight corners)
- A shop vacuum with a brush or crevice attachment
- A dry, clean cloth or microfiber towel
- A small amount of isopropyl alcohol, or mild dish soap on a damp cloth, for sticky residue
- A wooden skewer or a plastic pick for packed dust ports
- A spare sanding pad, if yours looks worn
Step by step: cleaning the sander body and pad
Work in the same order each time so you do not miss anything. The whole job usually takes a few minutes.
- Disconnect power or remove the battery.
- Peel off the used sanding sheet and throw it away. Do not try to reuse a sheet that is clogged or torn.
- Tap the sander gently on a work surface to knock loose dust off the pad.
- Brush the pad face in short strokes, working from the center toward the edges. Pay attention to the pointed tip on a detail sander, where dust packs in tightly.
- Vacuum the pad, then the vents and the dust port or dust canister opening.
- Wipe the housing with a dry cloth. Use a slightly damp cloth only on the outer body, and keep moisture away from vents, the switch and the motor.
- Empty and tap out the dust bag or canister, and check that the dust holes in the pad are open.
- Let everything dry fully before fitting a new sheet.
Cleaning a hook-and-loop sanding pad
Most detail sanders hold the sheet with hook-and-loop, the same idea as a fastener strip. The hooks on the pad grab the loops on the back of the sandpaper. When the hooks fill with dust, fibers or paint flecks, the sheet slips or peels off during use.
Start with a stiff brush. Pull it across the pad so it lifts out trapped fibers and dust instead of pressing them deeper. A vacuum with a brush head helps pull the loosened debris away. Work in good light so you can see whether the pad face looks fuzzy, shiny or flat.
If you see sticky spots from sap, adhesive or finish, dab them with a cloth lightly dampened with isopropyl alcohol. Test a small corner first, because strong solvents can soften some pad materials. Let the pad dry completely before adding a sheet.
Do not scrape the face with a metal blade or knife. It can cut the hooks and make the pad grip worse.
Clearing dust ports and vents
Dust that stays inside the sander is the usual cause of weak suction and a hot motor. Check the dust port after each project, since this is where debris tends to pack in.
Use a wooden skewer or plastic pick to loosen compacted dust, then vacuum it out. Check that the holes in the pad line up with the holes in the sheet you plan to use. If they do not line up, dust cannot be pulled away and the sheet will clog sooner.
A clean dust path also matters for results. If cleanup is a frequent chore for you, our best detail sander comparison lays out the published features of each model side by side, so you can see which ones suit your habits.
When to clean and when to replace the pad
Quick cleaning between sheets and a fuller cleaning after each project is a good routine. Larger sanders used on big jobs, such as the ones in our best sander for sanding a deck guide, collect dust faster and may need a quick brush more often.
Cleaning cannot fix a pad that is worn out. Use this table to decide.
| What you see | What it means | What to do |
|---|---|---|
| Dust or fibers on the pad face | Normal buildup | Brush and vacuum |
| Sticky residue | Sap, glue or finish transfer | Wipe with a cloth and isopropyl alcohol, let dry |
| Sheets slip even when the pad is clean | Hooks are flattened or worn | Replace the pad |
| Torn, cracked or crumbling edges | Pad damage | Replace the pad |
| Pad is uneven or the sander vibrates more | Pad is out of shape | Replace the pad and check the fastener |
Storing the sander afterward
Store the sander in a dry place, away from moisture and dust. Many people keep it in its case or a closed drawer. Keep the pad face clean and flat, and avoid piling heavy tools on top of it.
Consider keeping a few new sheets nearby so you can change sheets as soon as one wears out. Sanding with a clogged sheet makes the sander work harder and can leave marks on the surface.
Frequently asked questions
Can I wash a sanding pad with water?
It is best not to soak it. A lightly damp cloth on the outside is fine, but water near the motor, switch and vents can cause damage. Keep the pad as dry as you can and let it dry fully before use.
Can I use compressed air to clean my sander?
You can, but do it outdoors with eye protection and a dust mask. Compressed air can push dust deeper into the vents and the bearings, so a vacuum is usually the safer first choice.
How often should I clean my sander?
A quick brush between sheets and a fuller clean after each project works well for most people. If you sand heavily or on dusty material, check the pad and dust port more often.
Why does my new sheet keep falling off?
The most common cause is a dirty or worn hook-and-loop face. Clean the pad. If the sheet still slips, the hooks are likely worn and the pad should be replaced.