How to Change the Spindle and Sanding Sleeve on a Spindle Sander
Unplug the sander, loosen the nut or clamp at the top of the spindle, and slide the old sanding sleeve off the rubber drum. Slip a new sleeve of the same diameter on, tighten the drum so it expands and grips, and check that everything spins freely. To swap the whole spindle, remove the nut, washers and table insert, lift the spindle off, and fit the new one with its matching insert.
 Jet JOSS-SBest overall
 VEVOR BOSS200Mid-size benchtop with six sleeves
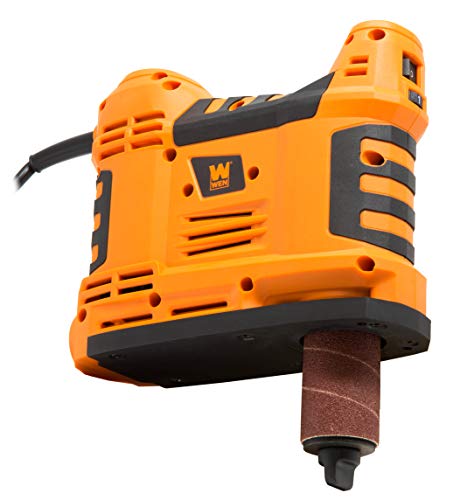 WEN HA5932Lightest in the lineup
Before you start: safety and setup
Always unplug the sander before you touch the spindle. An oscillating spindle sander can start if a switch gets bumped, and the spindle both spins and moves up and down, so there are pinch points near the shaft.
Clear the table and set the machine on a stable bench. Wear safety glasses, because a worn sleeve can shed grit or tear while you handle it. When you test the sander afterward, add hearing protection and a dust mask, since sanding is loud and creates fine dust.
- Unplug the machine from the wall
- Safety glasses on
- A screwdriver or the wrench that came with your sander
- A new sleeve in the right diameter and grit
- A soft brush for clearing dust from the table and shaft
Removing the old sanding sleeve
Most spindle sanders use a rubber drum that fits over the shaft, with a sanding sleeve wrapped around the rubber. Tightening a nut or clamp at the top squeezes the rubber so it bulges outward and grips the sleeve. Loosening it lets the rubber relax so the sleeve comes free.
Designs vary a little between brands, so check your manual for the exact fastener. The general process is the same.
- Unplug the sander and raise the spindle if your model allows it.
- Loosen the nut at the top of the spindle, or the clamp if your model uses one. A cross-point screwdriver is common for clamps.
- Pull the sleeve straight up and off the rubber drum. It may take some wiggling if dust has packed in around it.
- Brush away dust from the drum, the shaft and the table insert.
Installing the new sleeve
Make sure the new sleeve matches the drum diameter. A sleeve that is too large will slip, and one that is too small can be hard to force on and may tear. Check the diameter printed on the sleeve against the diameter of your drum.
Slide the sleeve down over the rubber until it sits evenly with no gaps at the top or bottom. If it fights you, some users pull the rubber drum completely off the shaft, put the sleeve on that way, and then reinstall the drum on the shaft. That can be easier than pushing a snug sleeve over a drum that is still mounted.
Next, tighten the nut or clamp gradually. The rubber should expand evenly and hold the sleeve firmly. Do not overtighten, since too much pressure can distort the rubber or cause it to bulge unevenly.
Finally, turn the spindle by hand. It should rotate smoothly with no wobble, and the sleeve should not shift when you push on it. With the area clear, plug in the sander and run it for a few seconds before you sand anything.
Changing the spindle itself
Sometimes you want a different diameter, not just a fresh sleeve. Small spindles suit tight curves. Larger ones suit gentle curves and long edges. Swapping the spindle takes a few extra steps.
The names of the parts differ by model, so treat this as a general guide and follow your manual where it differs.
- Unplug the sander and remove the sanding sleeve.
- Take off the nut and any washers that hold the drum in place.
- Lift the rubber drum off the shaft. Keep the washers in order.
- Remove the table insert, the plate around the spindle opening. Each spindle size normally has an insert with a close-fitting hole.
- Fit the new drum and washers, then install the matching insert.
- Tighten the nut, add a new sleeve, and spin the spindle by hand to check for wobble.
Matching the spindle, sleeve and insert
Three parts need to agree: the drum, the sleeve and the table insert. If any one is wrong, you get poor results or a safety problem. A gap that is too wide around the spindle can let a thin workpiece catch.
Use this table as a quick check before you start.
If you are still deciding which machine suits your shop, our best oscillating spindle sander comparison lists the published spindle sets and sleeve sizes for each model, so you can see what comes in the box before you buy extras.
| Part | What to match | What goes wrong if it is off |
|---|---|---|
| Rubber drum | Fits your shaft and nut | Wobble or slipping under load |
| Sanding sleeve | Same diameter as the drum | Loose sleeve, or a tear when installing |
| Table insert | Sized for the drum you are using | Wide gap that can catch thin stock |
| Grit | Coarse to remove stock, fine to finish | Burning, or slow progress |
How long a sleeve lasts
There is no single lifespan. A sleeve lasts as long as it keeps cutting, and that depends on the wood, the grit, the pressure and how often you clean it. Hardwoods and heavy pressure wear it faster. Resinous or sappy wood can clog the grit and make a sleeve seem worn out when it only needs cleaning.
Replace a sleeve when you see any of these signs:
Smooth, shiny patches where the grit is gone
Burn marks on the wood even with light pressure
Tears, loose edges or a seam that is lifting
Sanding that takes much longer than it used to
- Rub a rubber cleaning stick on the spinning sleeve to lift clogged dust before you replace it
- Move the workpiece across the full height of the sleeve so it wears evenly
- Use light pressure and let the abrasive do the work
Common problems after a change
If the sleeve slips, the nut is probably too loose, or the sleeve is a hair too big. Tighten a little more and check the diameter. If the spindle wobbles, remove the drum and check that the washers sit flat and nothing is caught under them.
If the sleeve rides up or down, make sure it is seated fully on the drum. Finally, if you also work on larger flat surfaces, a spindle sander is the wrong tool for them. Our best sander for sanding a deck page covers machines made for that job.
Frequently asked questions
Can I use a sleeve that is a different size than my drum?
It is best not to. The sleeve should match the drum diameter so the rubber can grip it evenly. A mismatched sleeve may slip, tear or wear unevenly.
Do I need to change the table insert when I change the spindle?
Usually yes. Each spindle size normally has its own insert with a close-fitting opening. Check your manual for the right one.
Why does my new sleeve burn the wood?
Burning is often caused by too much pressure, a grit that is too fine, or a clogged sleeve. Try lighter pressure, keep the workpiece moving and clean the sleeve.
Should I sand with the spindle at its lowest height?
Raising or lowering the spindle between passes spreads wear across the sleeve, which helps it last longer. Follow your sander's instructions for adjusting it safely.