How to Change a Bench Grinder Wheel: Step-by-Step Guide
Unplug the grinder, remove the wheel guard and tool rest, hold the wheel still, and loosen the arbor nut. Then swap in a matching wheel with the flanges and washers in the right order, snug the nut, and run the grinder for a minute behind the guard. Always match the new wheel's bore (arbor size), diameter and maximum speed rating to your grinder.
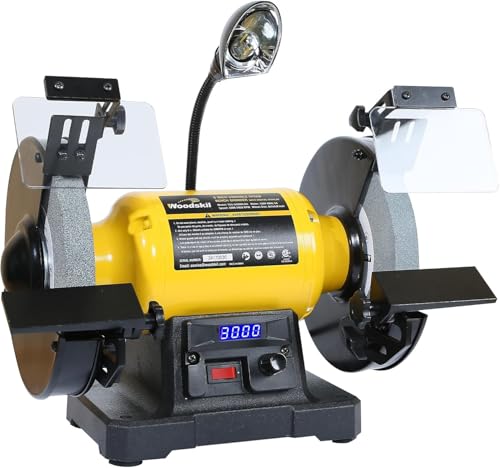 Woodskil TDS-G200VLGABest overall
 WEN BG625VVariable speed with warranty
 Greteefor NS-SLJ-01-3Cast iron variable speed
Before you start: safety and prep
A grinding wheel spins fast, and a damaged or mismatched wheel can break apart. Take a few minutes to set up properly before touching a single nut.
Unplug the grinder from the wall. Do not rely on the switch alone. Wear safety glasses or a face shield, and keep work gloves handy for handling the old wheel, which may have sharp edges or a worn, rough surface.
- Unplug the grinder and move the cord out of the way.
- Wear eye protection. Add a dust mask, since old wheels shed fine grit.
- Clear the bench so you have room to lay out parts in order.
- Have a wrench or socket that fits the arbor nut, plus a block of wood or a helper to keep the wheel from turning.
Tools and parts you will need
Most wheel changes need only basic hand tools. The exact nut size varies by grinder, so check your own before you start.
You also need the right replacement wheel. Our best bench grinder comparison lists the published wheel diameter and specs for each model, which helps when you shop for a matching wheel.
- Wrench or adjustable wrench for the arbor nut
- Screwdriver or socket for the guard and tool rest screws
- Replacement wheel with the correct diameter, thickness and bore
- New paper blotters (the soft discs that sit against the wheel), if the old ones are damaged
- Penetrating oil, if the nut is stuck
- Wire brush or rag to clean the flanges
How to remove the old wheel
Start by taking off the outer wheel guard (sometimes called the spark guard or eyebrow shield), then the wheel cover. Loosen the tool rest and slide it clear so it does not block the wheel.
Next, hold the wheel still. A wood block wedged between the wheel and the housing works, or have a helper hold it. Do not clamp down on the wheel itself in a way that could crack it.
Turn the nut in the direction that loosens it. Here is the part that trips people up: the arbor threads are usually made so the nut tightens against the direction the wheel spins. In general, that means the left-side nut often has standard (right-hand) threads and the right-side nut often has reverse (left-hand) threads, or the other way around depending on the design. Check for markings or the owner's manual before you force anything.
- Remove the guard and tool rest.
- Brace the wheel so it cannot spin.
- Loosen the arbor nut with a wrench, using the correct direction.
- Take off the nut, outer flange, blotter and wheel in order.
- Note how the flanges and washers sit so you can reassemble them the same way.
Understanding arbor size and wheel fit
The arbor is the shaft the wheel sits on. Arbor size is the diameter of that shaft, and it must match the bore, the center hole of the wheel. If the bore is too large, the wheel can wobble. If it is too small, it will not fit at all.
Many replacement wheels come with bushings or reducer rings that let one wheel fit more than one arbor size. Use them only as the wheel maker describes. Never force a wheel onto a shaft or grind out the hole.
Besides bore, check these three things before buying:
- Diameter and thickness: they must fit inside the guard and match what your grinder is built for.
- Maximum speed rating: the wheel's rated RPM must be at or above the grinder's no-load speed.
- Wheel type: grit and material should suit the metal you plan to grind.
| Wheel spec | What to match | Why it matters |
|---|---|---|
| Bore (arbor hole) | Arbor shaft diameter | Prevents wobble and poor seating |
| Outside diameter | Grinder's stated wheel size | Keeps clearance inside the guard |
| Thickness | Space between the flanges and guard | Allows the nut to tighten fully |
| Max RPM | At or above grinder speed | Prevents over-speed failure |
How to install and tighten the new wheel
Before mounting, inspect the new wheel. Hold it by the bore on one finger and tap it lightly with a non-metal handle. A sound wheel gives a clear ringing tone. A dull thud can point to a crack, so do not use it.
Clean the flanges so they sit flat. Slide on the inner flange, then a blotter, then the wheel, another blotter, the outer flange, and finally the nut. Keep the parts in the same order you removed them.
To tighten the wheel, use a snug, firm turn with the wrench while holding the wheel still. The goal is secure, not extreme. Over-tightening can crack the wheel or strip the threads. Make sure the nut is turning in the direction that tightens, which is opposite to the loosening direction you used earlier.
Final checks and first run
Put the guards, covers and tool rest back on. Set the tool rest close to the wheel, leaving only a small gap, and tighten it down so it cannot shift.
Stand to the side of the wheel, not in line with it. Plug the grinder in, switch it on and let it run for about a minute. Listen for rattling, watch for wobble, and shut it off right away if anything seems wrong.
If the wheel vibrates, unplug the grinder and recheck the seating, flanges and bore fit. A new wheel may also need dressing to run true. Use a proper wheel dresser, with eye protection on.
Frequently asked questions
Can I use an impact driver to remove the wheel?
It is not recommended. Impact force can crack a wheel, damage the arbor threads or loosen parts unpredictably. A hand wrench gives you much better control.
Why will my arbor nut not loosen?
You may be turning it the wrong way, since one side often uses reverse threads. If direction is right, a little penetrating oil and some patience usually helps. Do not use heat near the wheel.
How often should I replace a grinding wheel?
Replace it when it is cracked, chipped, out of round, or worn down close to the flanges. Check the wheel each time you use the grinder.
Can I mount a wheel with a different bore than my arbor?
Only if it comes with a proper bushing or reducer designed for that purpose. Never use makeshift spacers or force the fit.