How to Chalk a Roof Line for Shingles
Measure up from the eave at the same distance in at least two places, hook the chalk line at one mark, pull it tight to the other, lift the center straight up and let it snap. Repeat for each course, using the exposure printed on your shingle bundle. Chalk only on a dry, calm day, and wear fall protection on any roof.
 Tajima CR301JFBest overall
 IRWIN IWHT48441BCTough aluminum case
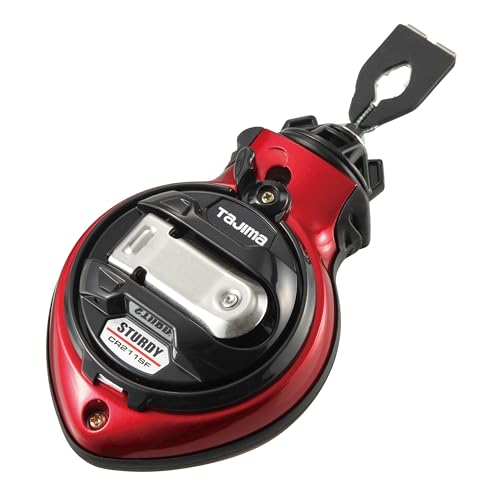 Tajima 1Metal body with belt clip
Start With Roof Safety
Roofs are where most of the risk in this job lives, and snapping a line makes it worse because you lean, reach and step backward while looking at the string. Set up your safety plan before you open the chalk.
Wear a harness tied to a secure roof anchor, use shoes with good grip, and keep the ladder tied off and extended well above the eave. Stay off wet, frosty or dusty shingles, and skip chalking when it is windy. Never step back to tighten a line without knowing where the roof edge is. If a slope feels too steep to stand on comfortably, use roof jacks or hire a pro.
Gather What You Need
The tool list is short, but a few details save time. Check that the chalk reel winds smoothly and that the hook is not bent before you climb, because fixing a jammed line on a slope is no fun.
Lay out the following before you start:
- A chalk line reel filled with blue chalk, which brushes off and weathers away more easily than dark colors
- A tape measure and a pencil or marker
- A straightedge or framing square to check the first mark
- The shingle bundle wrapper, which lists the exposure to use
- Roofing nails or a small clip if you have no helper to hold the hook end
- Fall protection and a helper if the runs are long
Find Your Starting Line
Every course of shingles depends on the first line, so take your time here. Begin at the eave. Check the drip edge and the underlayment, since your starter course usually sits just past the drip edge by the amount in the shingle instructions.
Measure up from the bottom edge at both ends of the roof and make a small mark at the same height on each side. Check a third mark near the middle. Eaves are not always perfectly straight, so if the middle mark and the end marks do not agree, decide whether to follow the eave or a true line and stay consistent.
Snap the first line between those marks. This line shows where the first course of shingles will start and gives you a clean reference for everything above it.
Snap the Lines Step by Step
Once the starting marks are set, the snap itself is quick. A clean snap depends on a tight line and a straight lift, not on force.
Follow these steps for each line:
- Pull the line out and hook the end over the edge of the roof or on a nail set at your first mark.
- Walk to the second mark with the case in hand, keeping the line off the shingles as much as you can.
- Pull the line tight, lining it up with the mark. Use the line lock if your reel has one.
- Pinch the line near the middle and lift it straight up, a few inches off the surface.
- Release it so it slaps flat. Do not pull it sideways, because that smears the mark.
- Check that the mark is clear. Rewind and snap again if it looks faint or doubled.
Mark Courses, Rakes and the Ridge
Next, work up the roof. Measure from the first line using the exposure printed on the shingle wrapper, and snap lines at that spacing. Many installers snap every course on small roofs and every few courses on larger ones, then use the shingle edge to keep rows straight in between. Measure at both ends each time, because small errors add up as you climb.
A vertical line from the eave to the ridge helps when you need to stagger seams or center a pattern. Snap it the same way, hooking at the eave and pulling toward the ridge. On a steep slope, only do this with a helper and fall protection, since the lift motion can throw you off balance.
At the peak, a line down the center of the ridge helps you set ridge cap shingles evenly. Measure from each side and make sure the marks match before you snap. Work carefully near the top, where the edge is closest to you.
Choose a Chalk Line for Roof Work
Roof layout puts different demands on a chalk line than interior work. Long runs, a visible mark on textured surfaces and a tool that is easy to carry on a slope all matter. Our best chalk line page puts the published specifications side by side so you can compare options for your roof size.
Line length is the first spec to check. Three models on that page list 100 ft, one lists 50 ft and one does not publish a length. Thickness matters too: a 1 mm braided nylon line gives a bolder mark, while the 0.5 mm model gives a finer one. Weight runs from 6.38 oz to 13.6 oz, which is worth thinking about when you carry the tool up a ladder.
Here is how the main choices line up for roof work:
| Spec | What it means on a roof | Watch for |
|---|---|---|
| 100 ft line | Covers a long eave or rake edge in fewer snaps | Longer lines need more care to keep off the surface |
| 50 ft line | Suits short runs, dormers and sheds | More repositioning on long edges |
| 1 mm line | Bolder mark that is easy to see on texture | Less fine than a thin line |
| 0.5 mm line | Finer, more precise mark | Harder to read from far away |
| Line lock | Holds the line tight while you snap | Not listed on every model |
Avoid Common Mistakes
Most crooked courses trace back to a few simple errors. Catch these early and your shingle rows will stay straight to the ridge.
Do not trust a single measurement. Measure at both ends and in the middle, then compare. Do not snap with a loose line, because slack gives a curved mark. Keep chalk off the finished surface where you can, since heavy dust can show on lighter shingles and may stay visible for a while. Finally, remember that rain and foot traffic wear marks away, so snap lines close to when you install and redo any that fade.
Frequently asked questions
Can I snap a roof line alone?
Yes on short runs if you can hook the end securely. A helper makes long runs more accurate and safer. Never lean past your balance, and keep your harness tied off while you work.
Do chalk marks stay on shingles?
They fade with foot traffic, rain and wind, so snap lines shortly before you install each section. Blue chalk is a common choice because it wears off more readily than dark colors.
What if my eave is not straight?
Measure up from the drip edge at several points. Decide whether to follow the eave or a true line, then stay consistent so the courses above stay straight and look intentional.
How do I keep the line from sagging?
Pull it as tight as you can and use the line lock if your reel has one. On long runs, ask a helper to hold the far end, and snap only when the air is still.