How to Build Garage Shelving From Scratch
Build garage shelving by framing each shelf from 2x4 lumber, topping it with plywood, and fastening everything with structural screws. Anchor the unit to wall studs, and keep the heaviest items on the lowest shelf. If you would rather skip the carpentry, a steel unit can be a faster route, and our best garage shelving page compares them.
 CCIOBTE storage shelvesBest overall
 SISESOL YSZXEHHJTallest at 79 in
 Letaya 1Steel panel shelf surface
Choose Wall-Mounted or Freestanding
The first decision is where the weight goes. Wall-mounted shelves hang from studs and keep the floor clear, which helps if you park inside or sweep often. Freestanding shelves sit on the floor and carry weight straight down, so they suit heavier bins and tools.
Both types use the same basic materials. The main difference is how the load reaches the ground, and that decides how much you need to rely on your wall.
| Type | Best for | Main advantage | Main limit |
|---|---|---|---|
| Wall-mounted | Light to medium bins, paint, hand tools | Floor stays open | Only as strong as the studs and screws |
| Freestanding | Heavy bins, tires, bulk items | Weight goes to the floor | Takes floor space and needs a wall anchor |
| Freestanding, attached to wall | Tall units in busy garages | Resists tipping | Needs studs in the right place |
Gather Tools and Materials
A basic shelf build needs common lumber and a few hand tools. Buy straight boards, because warped 2x4s make shelves that rock and sag. Sight down each board before you buy it.
- 2x4 lumber for uprights, front and back rails, and side supports
- 3/4 inch plywood or similar sheet material for the shelf tops
- 3 inch structural wood screws for the frame and 2.5 inch screws for the plywood
- Lag screws or structural screws long enough to reach well into wall studs
- Tape measure, pencil, level, and a speed square
- Circular saw or miter saw, plus a drill and driver
- Stud finder
- Safety glasses, hearing protection and work gloves
Plan Your Layout First
Measure the wall, then decide how many shelves you need and how tall your tallest bin is. Leave a little extra space above each bin so you can slide it in and out. A common approach is to put the tallest and heaviest items on the bottom shelf and lighter things higher up.
Next, find the studs with a stud finder and mark them. Wall studs are usually spaced 16 inches apart from center to center, but check yours, since older garages vary. Plan your uprights or wall supports to land on those marks.
Keep depth reasonable. Shelves around 16 to 24 inches deep hold most bins without turning into a place where things get lost. Deeper shelves are harder to reach and put more leverage on the wall.
Build a Freestanding 2x4 Shelf Unit
This is the simplest design and does not depend on your wall for strength. Work on a flat floor so the frame stays square.
- Cut four uprights to your chosen height, then cut matching front and back rails for each shelf level.
- Cut short side supports that match the shelf depth.
- Build one end frame by screwing two side supports between two uprights at each shelf height. Repeat for the second end.
- Stand the two end frames up and join them with the front and back rails at every level.
- Check for square by measuring both diagonals. If the numbers match, the frame is square.
- Add a diagonal brace on the back or sides to stop it from racking side to side.
- Cut plywood to fit, set it on the rails, and screw it down.
Build Wall-Mounted Shelves
For wall shelves, each shelf sits on triangular supports fixed to studs. Cut a horizontal 2x4 for the shelf arm, a vertical 2x4 for the wall side, and a diagonal 2x4 between them. Screw the three pieces together so they form a rigid triangle.
Fasten each support to a stud with long structural screws, using a level so the shelf tops line up. Place supports at every stud along the run, then lay plywood across them and screw it down.
Do not rely on drywall anchors for loaded shelves. The screws must go into solid framing. If a stud is not where you need it, adjust the shelf length instead of guessing.
Stay Safe While You Build and Use Them
Wear safety glasses whenever you cut or drive screws, and use hearing protection with a circular saw. Keep your hands clear of the blade path, and clamp boards rather than holding them with your fingers.
Before you drill into a wall, check for wiring and pipes. Garage walls often hide outlets, conduit and plumbing, so look at where they enter the wall and avoid those lines.
Use a stable stepladder for upper shelves, and never climb the shelves themselves. Tall units can tip, so anchor them to studs. Keep heavy items low, and do not store anything flammable, such as gasoline cans, near a water heater or other ignition source.
When a Steel Unit Makes More Sense
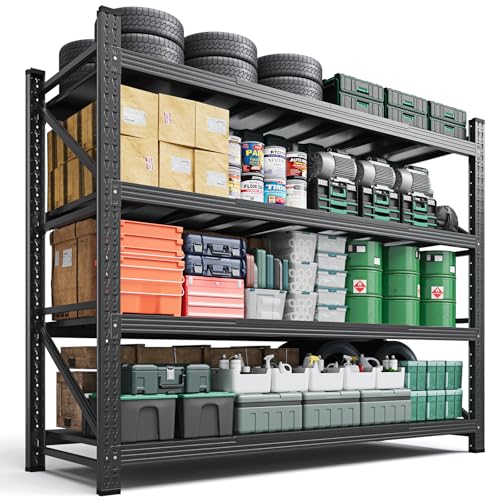
Building takes time and some tools, and homemade wood shelves do not come with published load ratings. A manufactured steel rack does. For example, the CCIOBTE 4-Tier unit lists 6000 lb total capacity and 1500 lb per shelf, with lateral bracing and a rust-resistant powder coating. It measures 79 in wide, 24 in deep and 73 in tall, and lists tool-free assembly.
If you are weighing the two routes, our best garage shelving page lists capacity, dimensions, shelf count and weight side by side. That makes it easier to see whether a steel rack covers your heaviest bins.
If you do buy one, check capacity per shelf rather than just the total, since the total is shared across all shelves. Our garage shelving comparison explains how to read those numbers, and why bracing matters for wobble. Some heavier models weigh around 100 lb, so plan to have a helper.
Finish and Maintain Your Shelves
Sand the plywood edges so they do not snag gloves or splinter hands. A coat of paint or sealer on the wood helps it resist moisture, which matters in a garage that sees damp weather or oil.
Once a season, check that screws are tight and that no shelf is bowing. If a board bends, move the weight to a lower shelf and reinforce or replace that support.
Frequently asked questions
What size lumber works best for garage shelves?
2x4s work well for most home garage shelves. Use them for uprights and rails, and add 3/4 inch plywood for the shelf tops. For very wide spans or heavy loads, add more supports rather than stretching boards.
Do I need to anchor freestanding shelves to the wall?
Yes, it is a good idea, especially for tall units. A simple bracket screwed into a stud keeps the unit from tipping if someone leans on it or pulls on a top shelf.
Can I build shelves above the garage door or rafters?
You can, but treat it as a separate project. Overhead storage carries a falling risk, so use proper hardware, find out what your ceiling framing can support, and keep loads light.
How far apart should shelves be?
Space them based on your tallest bin plus a few inches of clearance. Measure your actual containers before cutting, and use the extra room to slide bins in and out easily.