How to Apply Gutter Sealant to Seams, Joints and Leaks
Clean the leaking spot down to bare metal or vinyl, let it dry unless your sealant is rated for damp surfaces, then run a continuous bead along the seam and tool it smooth. Seal from the inside of the gutter, and give the sealant its listed rain-ready time before water reaches it. Good prep matters more than the brand.
 DAP 7079800765Best overall
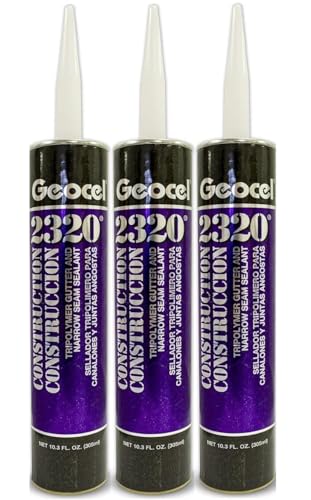 Geocel ORG7449242/3PK-FBABest value pack
 DAP 7079818399Best for small repairs
Find the leak before you seal it
Most gutter leaks start where sections meet: lap joints, corners, end caps and downspout outlets. These spots move the most as the metal heats and cools, so the old sealant cracks first. Sealing the wrong spot wastes a tube and a weekend.
The easiest way to find the source is to run a garden hose into the gutter, starting at the high end, and watch where water escapes. Mark each drip with a pencil or a strip of painter's tape. Drips that show up on the underside of a seam usually mean the joint has opened up. Drips at the end of the run point to a failed end cap.
Sealant works on cracked sealant and open seams. It will not fix rusted-through metal, a sagging gutter or a section that holds standing water because the slope is wrong. If the metal crumbles when you press it, plan on a patch or a replacement section instead.
Gather your supplies
You do not need much, but the right items make a neater bead and a longer-lasting repair. Pick a sealant that stays flexible, bonds to your gutter material and suits your weather. Our best gutter sealant page lists flexibility, temperature limits, rain-ready times and colors side by side if you are still choosing.
- Gutter sealant in a tube, plus a caulk gun if the tube needs one
- Plastic scraper or putty knife for old sealant
- Stiff nylon brush or wire brush for metal gutters
- Clean rags and a mild cleaner or denatured alcohol, if your sealant label allows it
- Painter's tape for clean edges
- Disposable gloves and safety glasses
- A stable ladder with a stand-off, or a ladder stabilizer
Prepare the surface
Preparation decides how long the repair lasts. Sealant bonds to the surface, not to dirt, so every step here matters.
Start by scooping out leaves and debris near the leak. Then scrape away all loose, cracked or peeling sealant with the plastic scraper. On metal, a wire brush removes oxidation and flaking paint. On vinyl, stick to the nylon brush so you do not gouge the surface.
Wipe the area with a clean rag and a cleaner that your sealant label recommends. Let it dry completely unless your product is rated for wet application. Moisture trapped under a bead is a common reason repairs fail early.
If you want tidy edges, run painter's tape along both sides of the seam, leaving a gap about as wide as the bead you plan to lay.
Apply the sealant to seams and joints
Work on one joint at a time so the sealant does not skin over before you tool it. Follow these steps:
- Cut the tube nozzle at a slight angle, with a small opening. You can always cut it larger.
- Seal from the inside of the gutter first, where the water flows. Push the nozzle along the seam and lay a steady, continuous bead.
- Press the bead into the seam with a gloved finger or a plastic tool so it fills the gap and wets both surfaces.
- For lap joints, add a bead along the overlapping edge on the inside, then smooth it so water runs over it, not into it.
- If the joint is wide or loose, add a second thin pass instead of one thick glob.
- Pull off any painter's tape while the sealant is still wet, then check the outside of the seam for gaps.
Seal corners, end caps and outlets
Corners and end caps take the most punishment. Water pools at them, and the metal flexes at the joint. Clean these spots well, then lay a bead along every edge where the cap or corner piece meets the gutter body. Work the sealant into the crease with your finger, and add a small dab over any rivet or screw head.
At downspout outlets, seal around the rim where the outlet tube meets the gutter bottom. Dry-fit the downspout connection first so you know where water travels. Sealant does not hold well on a moving part, so make sure the outlet is fastened firmly before you apply it.
Where a gutter meets fascia or roof flashing, a sealant with broad adhesion helps. The Geocel 2320 three-pack, for example, lists bonding to asphalt shingles, brick, concrete, glass, vinyl and wood, and it holds 30.9 fl oz across three tubes, which suits a house with many joints.
Wet, cold and curing conditions
Product labels vary a lot on weather, so read yours before you climb up. On our comparison sheet, the DAP Advanced Gutter & Flashing Sealant is listed for application from 0°F and on wet surfaces, and it is rain ready in 30 minutes. For the others, we do not have a listed minimum temperature or wet-surface rating, so plan on a dry, mild day.
The table below shows the rain-ready times listed in our data.
Even with a short rain-ready time, avoid sealing right before a storm. If rain is likely, finish the work early and cover the area or wait for the next dry window.
| Sealant | Tube size | Rain ready | Wet surface |
|---|---|---|---|
| DAP Advanced Gutter & Flashing Sealant | 9 fl oz | 30 min | Yes |
| DAP Dynaflex Gutter & Narrow Seam Sealant | 4.5 fl oz | 30 min | Not listed |
| DAP Gutter & Flashing Advanced Sealant | 10.1 fl oz | 60 min | Not listed |
| Geocel 2320 (3 pack) | 10.3 fl oz each | Not listed | Not listed |
| Geocel 2320 (aluminum gray) | 10.3 fl oz | Not listed | Not listed |
Stay safe on the ladder
Gutter work means heights, so treat the ladder as the biggest risk. Set it on firm, level ground, keep three points of contact, and never lean past the side rails. Use a stand-off or stabilizer so the ladder does not rest on the gutter itself.
Stay well away from power lines and the service drop at the roofline. Metal ladders conduct electricity, so look up before you place one. Wear safety glasses when you scrape or brush, since old sealant and debris can fall into your eyes.
Read the sealant label for ventilation and skin-contact notes, and wear gloves. If the weather is windy, wet or icy, skip the job.
When sealant is not enough
A bead of sealant is a repair for small gaps and failed joints. If a seam keeps reopening after a careful job, the gutter may be sagging, pulling away from the fascia or sloped the wrong way. Fix the hangers and slope first, then reseal.
Holes from rust or corrosion are a different problem. Sealant will not hold on crumbling metal, so cut out the damaged section or replace it. For long runs with many failing joints, plan to reseal each one in turn and compare tube options on our gutter sealant comparison before you buy.
Frequently asked questions
How much sealant does one repair use?
A single corner, end cap or short lap joint usually needs only part of a tube. A small tube, such as the 4.5 fl oz DAP Dynaflex, suits spot fixes, while many seams call for a larger tube or a multi-pack.
Should I seal from the inside or the outside?
Start on the inside, where water flows, since that stops the leak at its source. Then add sealant on the outside of the seam if you see gaps, so the joint is closed on both sides.
Can I paint over gutter sealant?
Several sealants on our sheet are listed as paintable, including DAP Advanced, DAP Gutter & Flashing and both Geocel 2320 options. Check the label for how long to wait before painting.
What color sealant should I choose?
Match the gutter so the bead is less visible. Our sheet lists crystal clear, white, medium gray and aluminum gray, and sealant shows on the outside of the gutter, so color is worth a look.