How Tight Should an Oil Drain Plug Be?
An oil drain plug should be snug enough to compress its washer or gasket and stay put, but never so tight that it stretches the plug or damages the oil pan threads. The best way is to thread it in by hand, then finish with a torque wrench set to the number in your vehicle's service manual. Hand tightening alone is not enough, and a big cheater bar is too much.
 ValvoMax [VM-QT-001]Best overall
 Fumoto F106NLever clip included
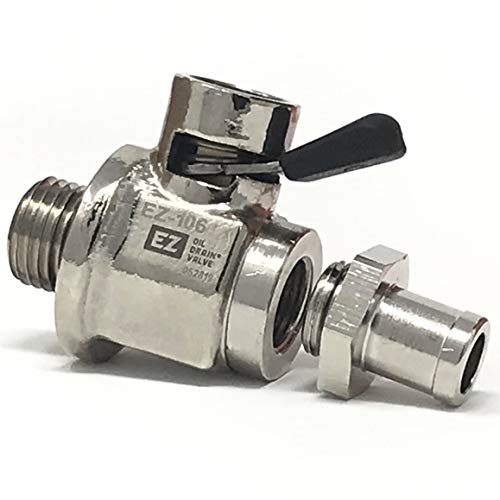 EZ Oil Drain Valve EZ-106RHTied for shortest length
Why the right tightness matters
A drain plug has two jobs: seal the pan and stay in place. A plug that is too loose can weep oil or back out over time. A plug that is too tight can strip the threads in the pan, which is a far more expensive problem than a drip.
Many oil pans are thin aluminum or stamped steel, and the threads are only a few turns deep. That is why the force you apply matters more than it seems. The goal is just enough clamping force to squeeze the sealing washer or gasket, not a maximum effort pull on the wrench.
Find the torque spec for your vehicle
The correct number comes from your owner's manual or the factory service manual. It depends on the pan material, the thread size and the type of seal, so a number from a different vehicle is not a safe stand-in. Do not trust a general figure from a forum post when the manual is a quick lookup away.
If you cannot find a spec, check the plug itself or the parts listing for the replacement plug. Some plugs and gaskets come with instructions. A dealer parts counter or a service manual for your exact engine can also confirm it.
How to tighten the plug, step by step
Work on a cool or warm engine, never a hot one, and make sure the car is supported safely before you slide underneath. Hot oil causes burns, so let it cool a bit first.
Follow this order every time:
- Wipe the pan opening and the plug threads clean with a rag.
- Fit a new washer or gasket if your plug uses one, or inspect the old one for cracks and flattening.
- Start the plug by hand. It should spin in easily for several turns. If it binds early, back it out and restart so you do not cross-thread it.
- Snug it with a wrench until the washer just seats.
- Finish with a torque wrench set to the manual's value, using a smooth pull rather than a jerk.
- Wipe the area dry, add oil, run the engine briefly and check for drips.
Hand tight, feel or torque wrench: how they compare
People use several methods, and they are not equal. Starting the plug by hand is always good practice. Stopping there is not, because a hand-tight plug can vibrate loose or leak. Tightening by feel works for some experienced mechanics, but it is the hardest method to repeat and the easiest way to overdo it on a soft aluminum pan.
| Method | Strength | Main risk |
|---|---|---|
| Hand tight only | Good for starting threads | May leak or work loose |
| Wrench by feel | Fast and needs no extra tool | Easy to overtighten or undertighten |
| Torque wrench to spec | Repeatable and matches the manual | Needs the correct spec and a calibrated tool |
Washers and gaskets change the feel
The seal under the plug does much of the sealing work, so its condition matters as much as the torque. Common types include crush washers, copper washers, fiber gaskets and O-rings. Our valve data shows the same variety: listed seals include an O-ring, a fiber gasket and a copper washer, and some listings do not say at all.
A crush washer is designed to deform once and is usually replaced at each change. Reusing a flattened washer can leave a gap that no amount of extra tightening fixes. If the plug leaks, replace the seal before reaching for a longer wrench.
If you stripped it or it still leaks
If the plug keeps turning without getting tight, stop. Continued force will only widen the damage. A plug that will not tighten usually means worn pan threads, and repair options include an oversize plug, a thread insert or a repair kit made for your pan. A shop can advise if you are unsure.
If it only seeps, check the seal first, then confirm the plug is the right thread size and pitch. Thread mismatches are a real risk, which is why drain valve makers list sizes such as 14 mm at 1.5 mm or 12 mm at 1.75 mm.
Using a drain valve instead of a plug
Some owners swap the plug for a drain valve so they do not have to remove it at each change. That means the plug is tightened once, and the valve is opened and closed afterward. The valve still has to be installed to its proper spec, and the thread must match your pan exactly. Our best oil drain valve page lays out thread, body material, seal type and hose end side by side so you can check the match.
You will also need somewhere to catch the oil. If you are choosing equipment for the whole job, see our best oil drain pan comparison. Wear safety glasses, because oil can drip or spray unexpectedly when a plug comes out, and wear gloves to handle warm oil.
Frequently asked questions
Do I need a torque wrench for an oil drain plug?
It is the most reliable tool because it applies the exact force in your manual. A regular wrench can work if you tighten carefully, but a torque wrench removes the guesswork, especially on aluminum pans.
Should I reuse the drain plug washer?
Crush washers are usually meant for one use, so a new one is the safer choice. Reusable seals such as some O-rings or copper washers should still be checked for flattening, cracks or damage before you refit them.
Should I put sealant on the drain plug threads?
Usually not. The washer or gasket is what seals the plug, and extra sealant can change how much clamping force you actually get. Follow your manual if it says otherwise.
How soon should I check for leaks after tightening?
Right away. Wipe the plug and pan dry, run the engine for a minute or two, then look for drips. Check again after a short drive, and once more the next time you park.