How Tight Should an Exhaust Clamp Be?
Tighten an exhaust clamp to the torque the clamp maker lists, and if there is no number, snug it evenly until the joint is leak-free and the band has not crushed or kinked the pipe. There is no single value that fits every clamp. Size, band design and bolt type all change the right answer, so the instructions that came with your clamp come first.
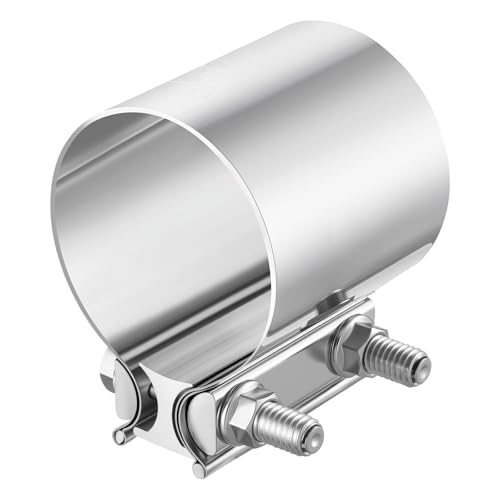 EVIL ENERGY 473SU5TBest overall
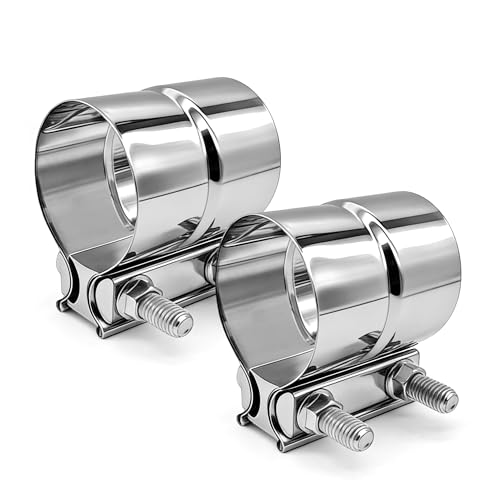 SKYMIRO CPBJ-3IN-2Best double-layer band
 SKYMIRO CPSC-25IN-1Best butt joint clamp
The short version: snug, even and leak-free
A good exhaust clamp is tight enough that the joint cannot twist or slip by hand and no exhaust escapes, but not so tight that the pipe is dented. Modern band clamps are built to spread force around the whole circle, so they seal without much brute force.
The best guide is a torque wrench and the maker's number. The EVIL ENERGY 3.0 in lap joint clamp on our comparison page, for example, lists a torque of 63 N·m, which works out to roughly 46 ft-lb. That number belongs to that clamp only. A different clamp, bolt size or band thickness can call for something else, so do not copy it onto another product.
If your clamp came with no torque figure, check the maker's listing or packaging before guessing. If you still cannot find one, use the by-feel method below and check for leaks.
Why one number does not fit every clamp
Torque is just a measure of how hard the bolt is turned. What you really want is the right clamping force on the pipe, and that depends on the hardware. A larger bolt can take more turning force than a smaller one, and a thick double-layer band resists squeezing differently than a thin single band.
This is also why old U-bolt clamps are a poor model for judging tightness. They press at two points and tend to crush the pipe, so people crank them down and they still leak. A band clamp with an I-block sealing piece, like the ones in our best exhaust clamp comparison, grips all the way around, so the goal is even pressure rather than maximum pressure.
Where the number is listed, treat it as the target. Forum advice such as "tighten until it just starts to distort" is common, but it is a rough rule of thumb and easy to overshoot, which is why a published spec is better.
How to tighten an exhaust clamp, step by step
The order of work matters as much as the final tightness. Rushing to full torque on one side is a common reason for leaks.
- Let the exhaust cool completely, then support the pipes so nothing hangs from the joint.
- Clean both pipe ends of rust, dirt and old sealant so the surfaces meet cleanly.
- For a lap joint, slide the smaller pipe into the larger one until it seats. For a butt joint, line up the two pipe ends so they meet squarely.
- Slide the clamp over the joint and center it. The I-block or sealing piece should sit over the seam, with the bolt in a spot you can reach.
- Turn the nut by hand until the band just grips, then tighten in small, equal steps. If your clamp has two bolts, alternate between them so the band closes evenly.
- Bring the clamp to the listed torque with a torque wrench, or to firm snugness if there is no spec.
- Check that the clamp is still centered and that the band edges are not twisted.
- Start the engine only when it is safe to do so, and check for leaks (see below). Re-check tightness after the first heat cycle.
Signs your clamp is too loose or too tight
You can learn a lot from the joint itself. Leaks and rattles point to too little force, while crushed metal points to too much.
| What you notice | Likely cause | What to do |
|---|---|---|
| Ticking or puffing sound at the joint, soot streaks | Too loose, or clamp is off-center | Retighten evenly, and recenter if needed |
| Joint twists or slides by hand | Too loose | Tighten in small steps to the listed torque |
| Pipe looks dented or squeezed under the band | Too tight | Loosen, inspect the pipe, and replace damaged parts |
| Bolt stretches, threads strip or the nut will not hold | Too tight or worn hardware | Replace the clamp hardware |
| Leak even at the correct torque | Wrong clamp size, damaged pipe or poor seating | Re-measure the pipe and check the joint surfaces |
Can you over-tighten an exhaust clamp?
Yes. Too much force can deform the pipe, stretch or strip the bolt, and crack or distort the band. A deformed pipe can also leak because the clamp can no longer seat evenly, which leads people to tighten more and make it worse.
If a joint keeps leaking, more torque is rarely the fix. Check that the clamp matches the outside diameter of your pipe, since a clamp that is slightly the wrong size will not seal. Also check that you chose the right type: lap clamps are for a pipe sliding into another pipe, while butt clamps are for two pipes of the same size meeting end to end.
Wider bands spread the clamping force over more of the pipe. Among the clamps we compare, the SKYMIRO 2.5 in butt joint clamp lists a 3.5 in band, the widest on the page, along with an aluminum I-block that spreads force around the pipe. You can see how these specs line up in our exhaust clamp comparison.
Safety notes before you start
Exhaust work has real hazards, so take a few minutes to set up safely.
- Work only on a cold exhaust. Pipes and mufflers stay hot long after the engine stops and can burn you badly.
- Support the vehicle on proper jack stands on level ground. Never rely on a jack alone, and never crawl under an unsupported vehicle.
- Wear safety glasses, because rust and debris fall when you work under a vehicle, and wear gloves for sharp pipe edges.
- Run the engine only outdoors or somewhere with real ventilation when you test for leaks. Exhaust contains carbon monoxide, which is odorless and dangerous.
- Keep hands and loose clothing away from moving parts and hot components during the leak check.
Choosing a clamp that is easier to get right
A well-matched clamp makes the tightness question simpler. Pick the correct type, measure the outside diameter of the pipe, and look for a published torque spec when one is available. Stainless steel bands resist rust longer than plain steel, which helps the joint stay sealed and removable over time.
Where our data lists a torque figure, it is easy to follow. The EVIL ENERGY clamp states one, while several others on the page do not list a figure, so for those you will rely on the maker's instructions or the by-feel method. To compare size, band width and materials in one place, see our best exhaust clamp page.
Frequently asked questions
Do I need a torque wrench for an exhaust clamp?
It is the best way to hit a listed spec, since a wrench removes guesswork. If your clamp has no listed torque, tighten evenly by hand tools until it is snug and leak-free, and avoid crushing the pipe.
Should I tighten the clamp again after driving?
Yes, a quick check after the first heat cycle is a good habit. Metal expands and settles as it heats and cools, so a clamp can loosen slightly. Let everything cool fully before touching it.
Can I reuse an exhaust clamp?
Some stainless band clamps are designed for repeated removal, but inspect yours first. If the band is bent, the threads are damaged or the sealing piece is worn, replace it.
Does it matter which way the bolt faces?
It should sit where you can reach it with a wrench and where it will not touch other parts or the ground. Keep it clear of heat shields, wiring and fuel or brake lines.