Can You Learn Welding on Your Own at Home?
Yes, you can learn to weld on your own at home. Basic welds come quickly with a beginner-friendly machine, a safe workspace and steady practice on scrap steel. Making strong, correct welds takes longer, so plan to check your work often and skip structural jobs until your skills are proven.
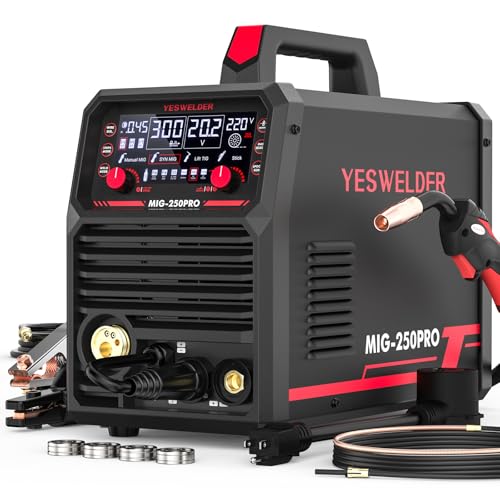 YESWELDER MIG-250DS PROBest overall
 ARCCAPTAIN MIG200Saved presets for repeat jobs
 BILT HARD WLD-1603Portable 250 A steel welder
What self-taught welding can and can't do
Most people can lay a decent bead on scrap steel within a few practice sessions. Welders who teach themselves often say the same thing: getting metal to stick together is easy, but making a weld that is truly sound is the hard part.
A weld can look neat and still be weak if it lacks penetration or fusion. That matters little for a garden trellis or a workbench frame. It matters a lot for trailer hitches, vehicle parts, or anything that carries a person.
So the honest answer is yes for hobby and repair projects, with limits. Keep load-bearing and safety-critical work for later, or for a certified welder.
Pick the right process to start with
Your first decision is the process. Wire-feed MIG welding is the usual starting point at home because the machine feeds wire for you and you only control the gun position and travel speed. Flux-core wire works like MIG but needs no gas bottle, which is handy for outdoor or windy work.
Stick welding is simple and tolerant of dirty or rusty metal, but it has a steeper learning curve for arc starting. TIG gives very clean results, but it asks you to coordinate a torch, a filler rod and often a foot pedal, so most beginners add it later.
A multi-process machine lets you start with MIG and explore stick or Lift TIG on the same unit. Our best welding for beginners page ranks machines that offer several processes on one spec sheet.
Choose a machine that helps you learn
Settings are where many beginners struggle. Mismatched voltage and wire speed cause spatter, burn-through and weak welds. Synergic control reduces that problem by picking matched settings from a single input, such as wire diameter or amperage. Every machine on our comparison page lists synergic control.
Power supply matters too. Every ranked model runs on 110V/220V dual voltage, so you can learn on a standard household outlet and move to 220V later for thicker steel. Check the listing for an adapter and for any switching rules. ARCCAPTAIN, for example, says to wait until the screen turns off before changing voltage.
Weight and included gear also affect your first months:
Our ranked machines list max output from 135 A to 250 A. Where makers list a steel rating, it runs from 0.12 in to 0.55 in. Buy for the thickest steel you expect to weld, not only your first project.
For a small shop or a garage you move around, weight matters. The BILT HARD WLD-1603 lists 21.49 lb with a 0.375 in steel rating and a 60% duty cycle. Our lightest starter pick lists 12.1 lb and welds steel up to 0.19 in.
Read the box contents. Some machines need a separate TIG torch or spool gun. The BESTMIG 145A lists a helmet and gloves, but its 0.12 in steel rating is the lowest on the page.
- Dual voltage so a household outlet works for learning
- Synergic control with a manual mode you can grow into
- Amperage and steel rating that fit your future projects
- Weight you can lift and move without strain
- A clear list of what is and is not in the box
Set up a safe home workspace
Safety comes before your first arc. Welding brings intense light, sparks, heat, fumes and electricity into one small area, so set up the space first.
Use a concrete floor or a bare garage slab, and clear away paper, rags, sawdust, solvents and fuel. Keep a fire extinguisher rated for ordinary and electrical fires within reach. Keep a bucket of sand or a fire blanket nearby for small flare-ups.
- Eye protection: wear a welding helmet with the right shade every time you strike an arc. Add safety glasses underneath, since grinding and chipping slag throw debris. Warn anyone nearby never to look at the arc.
- Skin protection: wear leather or flame-resistant gloves, a flame-resistant jacket, long sleeves and closed leather boots. Avoid synthetic clothing that melts and cuffs that catch sparks.
- Ventilation: work with open doors and a fan that moves fumes away from your face. Never weld galvanized, plated or painted metal without removing the coating first, since the fumes are harmful. Do not weld on containers that held fuel or chemicals.
- Electricity: use a properly rated outlet and cord, keep cables dry and undamaged, and never weld while standing in water. Follow the maker's rules for switching voltage.
- Gas: if you use a shielding gas cylinder, chain it upright, cap it when moving it, and keep it away from heat.
- Hearing and dust: wear hearing protection and a dust mask when using an angle grinder to clean welds.
A simple practice plan
Practice works best in short, repeated sessions with a clear goal each time. Use clean mild steel scrap of one thickness and wipe off rust, oil and mill scale with a wire brush or grinder before welding.
Follow these steps in order:
Step 1 is dry runs. Without striking an arc, rehearse your posture, the gun angle and the path along the plate. Rest your arm on something stable.
Step 2 is straight beads on flat plate. Aim for even width and steady travel speed. A sound MIG weld usually sounds like steady sizzling, not loud popping.
Step 3 is tee joints and lap joints. Join two pieces and check both sides for fusion.
Step 4 is destructive testing. Clamp a practice joint in a vise and bend or hammer it apart. A good weld tears the base metal rather than separating along the weld line. If it pops apart cleanly, adjust your settings or travel speed.
Step 5 is a small real project, such as a shelf bracket or a cart frame, once your test welds hold up.
Self-teaching versus other routes
You do not have to choose only one route. Many people mix them, for example teaching themselves the basics and then asking an experienced welder to look at their joints.
The table compares the common options in general terms.
| Route | Strengths | Limits |
|---|---|---|
| Teach yourself at home | Flexible schedule and no travel; you can practice whenever you like | No one to spot bad habits; easy to build poor technique without noticing |
| Community or trade class | Hands-on coaching and access to shop equipment | Fixed schedule and a limited number of seats |
| Mentor or experienced friend | Quick feedback on your actual welds | Depends on finding someone willing and available |
| Video lessons plus practice | Easy to replay and slow down technique demonstrations | Cannot see your welds or correct your posture |
When to get help or hold back
Ask for a review when something looks off, such as lots of spatter, a bead that sits on top of the metal, or holes burned through thin plate. A second pair of experienced eyes can fix a habit in minutes.
Hold off on any weld where failure could hurt someone. That includes vehicle frames, brakes, steering parts, ladders, trailers and lifting equipment. Those jobs need proven skill and often inspection.
Keep your expectations realistic. Skill builds with hours under the helmet, and a machine with the right settings only removes part of the difficulty.
Frequently asked questions
How long does it take to learn basic welding?
It varies with practice time. Many beginners can run usable beads on scrap after a few sessions, but consistent, sound joints take much longer.
Do I need a gas bottle to start?
No. Flux-core wire needs no shielding gas, so it works for early practice. Gas MIG gives cleaner welds on clean steel but adds a cylinder to handle.
Can I weld in an apartment?
Usually not. Welding creates sparks, fumes and a fire risk, and many leases and fire codes forbid it indoors. A garage, driveway or outdoor spot with good airflow is safer.
What metal should I practice on first?
Clean mild steel in one thickness. Avoid galvanized or coated metal, which gives off harmful fumes, and move to thicker steel or aluminum only after your basic beads are steady.
Do I need a special outlet?
Not necessarily. The machines on our comparison page run on a standard 110V household outlet and also support 220V. Check the maker's instructions and your circuit's capacity before you plug in.