Can Honey Oak Cabinets Be Restained a Darker Color?
Yes, honey oak cabinets can be restained a darker color. The easiest route is a gel stain applied over a cleaned and lightly scuffed finish, while stripping to bare wood gives the most even and predictable result. Going darker is much easier than going lighter, so test your color on a hidden spot first.
 Luomorgo Leads our spec ranking
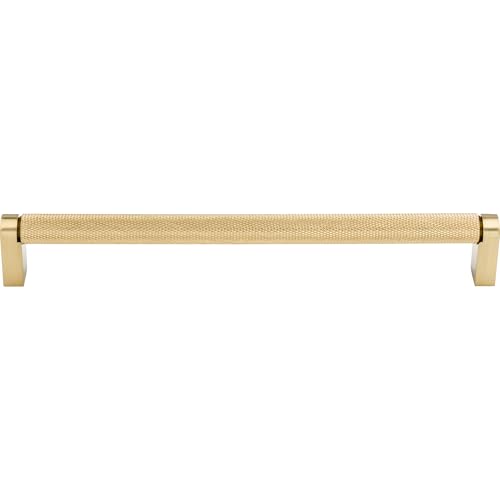 Top Knobs M2604Heaviest pull, warm bronze
 Bmgop BSS0038Most knobs per pack
Why darker works and lighter does not
Honey oak is a light to medium wood with an orange-brown tone, usually sealed under a clear topcoat. Stain works by adding pigment, and more pigment means a deeper color. That is why darkening is realistic for most kitchens.
Going the other way is a different story. You cannot add pigment to make wood lighter, and bleaching oak is slow and uneven. If you might want a lighter look later, choose a dark shade you will truly enjoy.
Oak also has a strong, open grain. Dark stain settles into those pores and makes the grain pattern stand out more, not less. Many people like that texture, but it is worth knowing before you start.
Three ways to restain darker
There is no single right method. The best choice depends on how much time you have, how worn the current finish is, and how exact you want the color to be.
The table below sums up the tradeoffs in general terms.
| Method | How it works | Best for | Main drawback |
|---|---|---|---|
| Gel stain over the old finish | Clean, scuff sand, then wipe on thick pigmented gel | Sound finishes and a weekend project | Color can look slightly painted-on if applied unevenly |
| Tinted topcoat (stain plus varnish in one) | Brush on a colored polyurethane in thin coats | Small color shifts on tidy surfaces | Streaks and drips are common, and results vary by coat |
| Strip and restain | Remove the old finish, sand to bare wood, then stain and seal | Worn or sticky finishes and a true wood look | Most time, mess and chemical handling |
Step by step with gel stain
Gel stain is the most popular approach because it sits on top of the old finish and does not need to soak into bare wood. Here is the basic order of work.
- Remove doors, drawer fronts and all hardware. Label each piece so it goes back in the same spot.
- Degrease every surface. Kitchen cabinets collect cooking residue that blocks stain.
- Scuff sand lightly with fine sandpaper, or use a liquid deglosser, so the new coat can grip.
- Wipe away all dust with a tack cloth or a barely damp rag.
- Test the stain on the back of a door or inside a frame, and let it dry fully before judging the color.
- Apply a thin coat with a foam brush or lint-free cloth, working with the grain.
- Wipe off excess if the product directions say to, then let it dry for the full recommended time.
- Add a second thin coat if you want deeper color, then finish with a compatible clear topcoat.
Prep and safety basics
Stains, strippers and topcoats give off fumes. Work with windows open and a fan pushing air outdoors, and wear a respirator rated for organic vapors. A basic dust mask is not enough for this job.
Wear safety glasses and chemical-resistant gloves. If you sand, add a dust mask and consider hearing protection with a power sander. Keep children and pets out of the work area.
Rags soaked in oil-based stain or finish can heat up and ignite on their own as they dry. Lay them flat outdoors, or soak them in water in a metal container, before disposal. Check local rules for getting rid of used solvents.
If your home was built before 1978, older paint layers on cabinets could contain lead. Test before sanding or stripping anything that was ever painted.
Pick hardware after the color is set
Dark stain changes how your pulls and knobs read. Honey oak leans orange-brown, and our best hardware for honey oak cabinets guide explains why warm finishes such as oil-rubbed bronze and antique brass blend with it. Brushed nickel gives a calmer, cooler contrast.
On a darker stain, the same finishes usually still work, though contrast changes. Hold a sample against your test patch before you buy a full set.
Measure center-to-center spacing before you order. It is the distance between the two screw holes on a pull. On that comparison page, the pulls range from 5 in to 12 in, so match your existing holes or plan to fill and redrill. Count every door and drawer as well, since pack sizes vary from one piece to 16.
Mistakes that spoil the finish
Most problems come from rushing the prep. Skipping the degreasing step is the biggest one, because stain will bead or peel over grease.
Heavy coats are another issue. Thick layers stay tacky, trap dust and look blotchy. Several thin coats give better control.
Finally, judge color only when it is dry and in the room's normal light. Wet stain looks darker than the final result, and kitchen lighting can shift the shade.
- Do not skip the test patch.
- Do not mix brands of stain and topcoat without checking compatibility.
- Do not reinstall doors until the finish has cured as directed.
- Do not forget to stain the door edges and the inside lip.
Frequently asked questions
Do I have to strip honey oak cabinets before restaining?
Not always. If the existing finish is intact, a clean and scuff sanded surface can take gel stain. Strip only when the finish is peeling, sticky or damaged, or when you want a true bare wood look.
How many coats does it take to get a much darker color?
It depends on the product and the shade. Many people apply one or two thin coats and judge after drying. Add coats gradually, since each layer deepens the color and is hard to reverse.
Will the oak grain still show after going darker?
Yes. Oak has open grain, and dark stain tends to emphasize it. If you want a smooth, uniform look, painting is a better route than staining.
Can I keep my old hardware after restaining?
Often yes, and it saves effort since the holes already line up. Clean it, check that the finish still suits the new stain, and reuse it if it looks right against your test patch.